How do I add, connect, reorder, and delete nodes in SMOC Studio?
Category: Configurator
1) Add a new node
You can add nodes in two common ways:
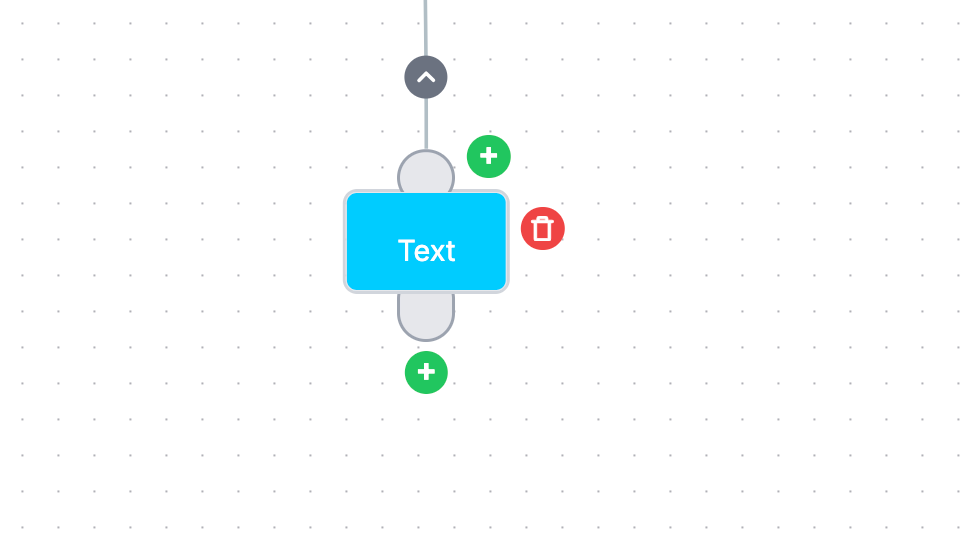
- - Click the + under an available output handle to add the next step in that path.
- - Click the + above a node to insert a node before it.
Then in Add new Flow element, choose the node type (Text, Survey Question, Form, Promo, etc.).
2) Connect nodes
To connect paths:
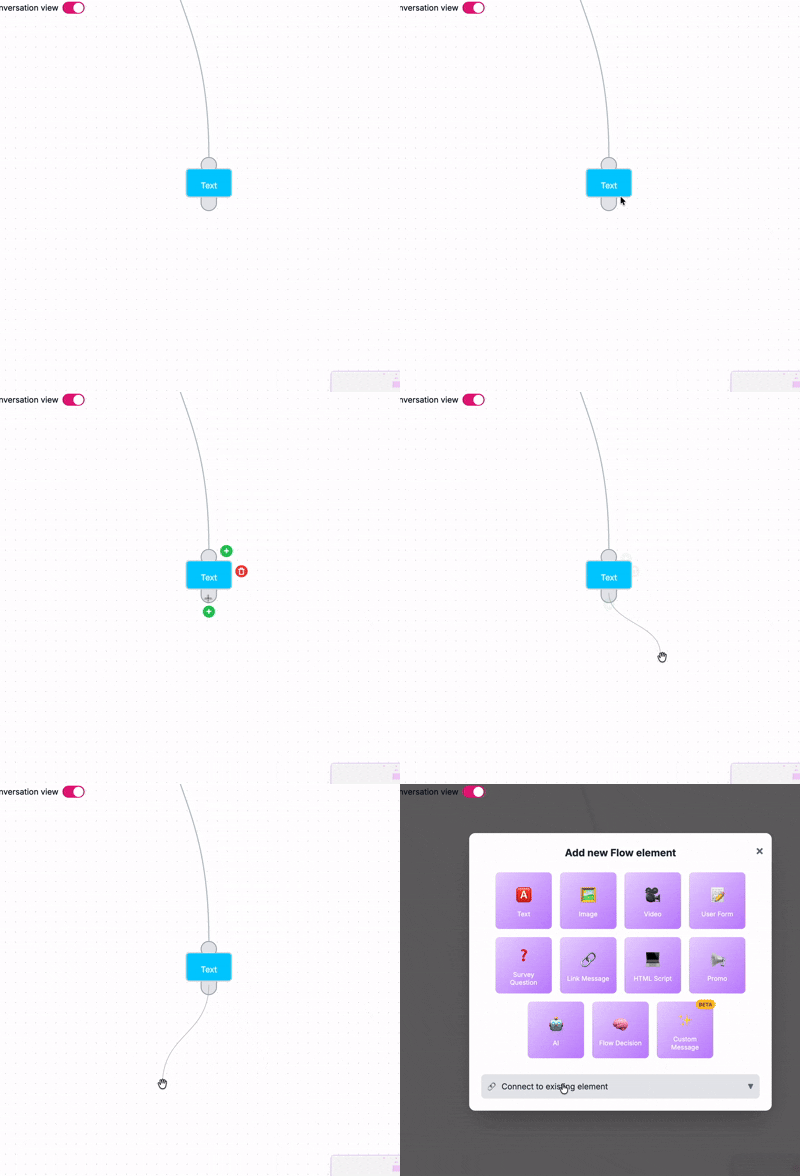
- - Drag from a source handle to another node (or to empty space to create a new node).
- - For branch nodes (Survey/Decision/AI), connect each output handle to its own next node.
- - If relevant, use Connect to existing element in the add modal to link to an existing node instead of creating a new one.
3) Reorder nodes (change flow order)
In Studio, “reorder” usually means changing execution order by inserting/reconnecting nodes, not just moving visuals.
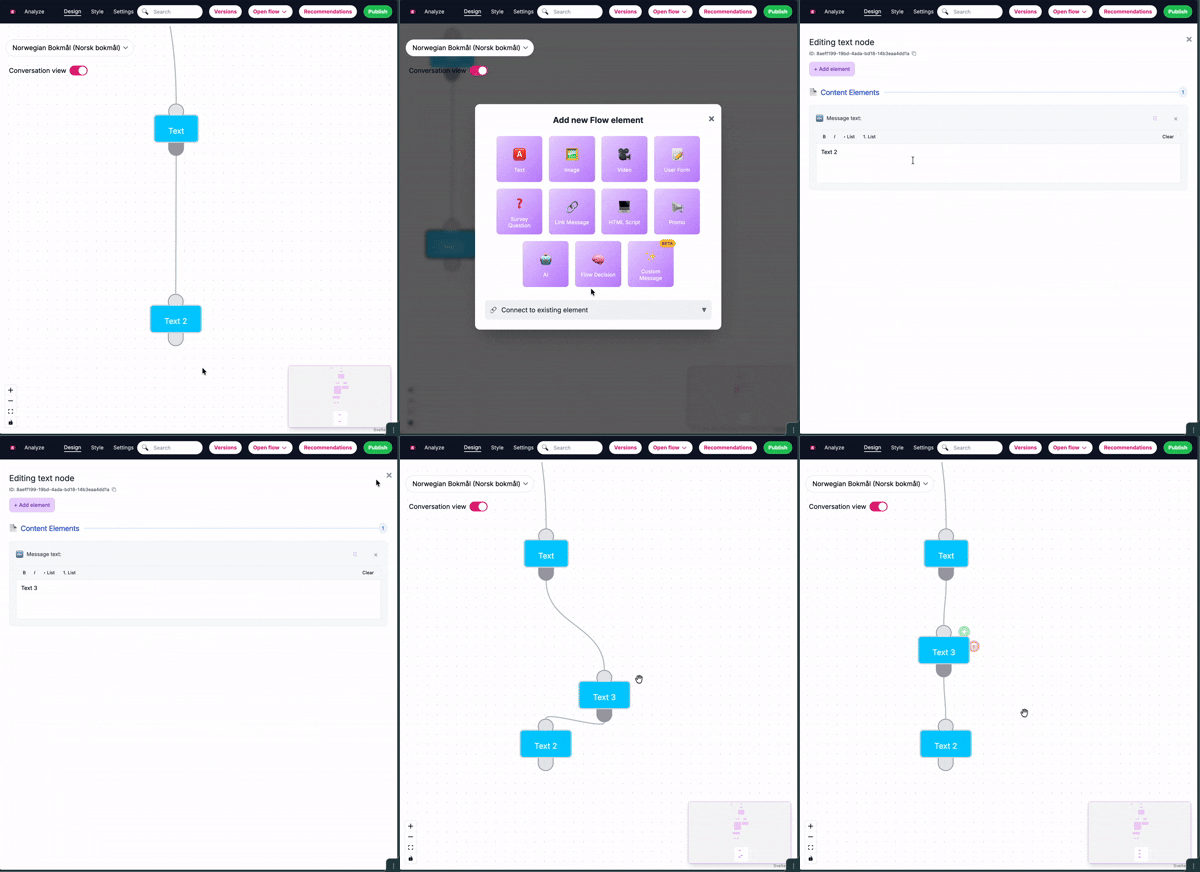
- - Use insert above (+ above node) to place a step earlier in the path.
- - Add from a specific output handle to place a step in the right branch.
- - Reconnect edges when needed to move a node to a different position in the flow logic.
4) Delete a node
To remove a node:
- - Hover/select the node in Design mode.
- - Click the red delete button on the node.
- - Confirm the flow still has valid paths after deletion.
Tip: delete intentionally in branched flows, since removing one node can affect downstream routing.
5) Safe editing workflow for large flows
- - Zoom out and identify the exact branch first.
- - Add/connect one change at a time.
- - Test each edited path.
- - Use Versions checkpoints before major restructuring.